
Curious cats and sticky situations often go hand in paw. One moment your feline is prowling around, the next they’ve found themselves tangled in a mouse trap glue and all. While it might seem like a messy disaster, with the right approach, patience, and gentle techniques, you can safely free your cat from the sticky trap without stress or injury.
In this guide, Nexus Pets walks you through every step to remove mouse trap glue from your cat’s paws and fur, keeping your furry friend comfortable, clean, and happy.
When to Stop and Call the Vet Immediately
While many fly or mouse trap glue incidents can be handled safely at home, there are situations where professional intervention is essential. Stop any home removal attempts and contact your veterinarian immediately if any of the following apply:
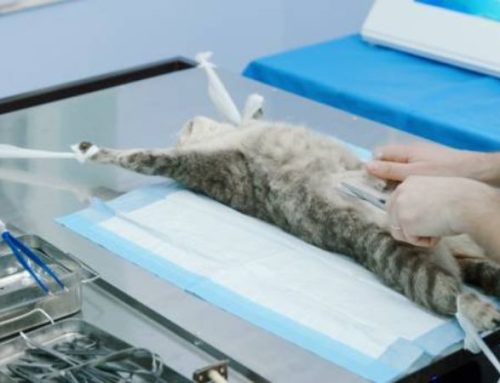
- Ingestion of Trap Components: If your cat has swallowed glue, pieces of plastic from the trap, or a mouse or insect caught in the adhesive, this poses a serious risk of gastrointestinal upset, blockage, or poisoning. Do not attempt further removal at home—seek veterinary care immediately.
- Large or Sensitive Areas Affected: If the glue covers more than a small patch of fur, particularly around sensitive regions such as the face, eyes, mouth, or genital area, home removal can be risky and may cause accidental injury. A veterinarian can safely remove adhesive from delicate areas without causing pain or stress.
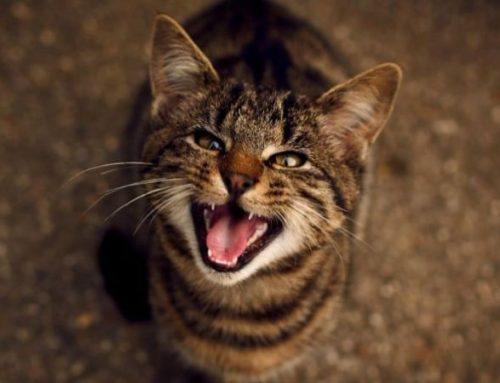
- Aggressive or Stressed Behavior: If your cat becomes aggressive, panicked, or highly anxious during removal attempts, continuing at home could result in scratches, bites, or further injury to your cat. Similarly, if you notice any cuts, swelling, or irritation while trying to remove the glue, it’s time to stop and let a professional handle the situation.
Key Tip: When in doubt, always err on the side of caution. A veterinarian has the tools, experience, and, if necessary, safe sedation methods to remove stubborn adhesive safely and prevent complications.
Preparation: Assessing the Situation and Gathering Supplies
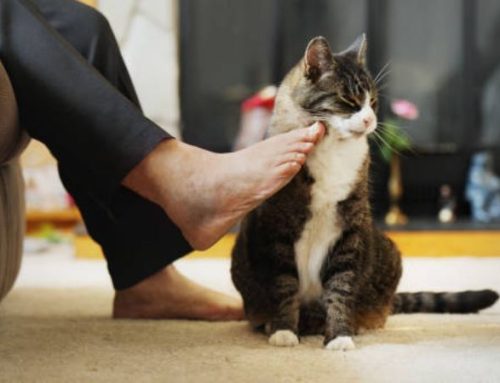
1. Securing and Calming Your Cat
A calm, restrained cat is much easier and safer to work with. Follow these steps:
- Use a Towel Wrap (Cat Burrito): Gently wrap your cat in a soft towel, leaving only the affected area exposed. This prevents sudden movements and protects both you and your cat from scratches or bites.
- Create a Quiet Environment: Choose a calm, low-traffic area with minimal noise and distractions.
- Have a Second Person Assist: If possible, enlist another person to hold and comfort the cat. One person can keep the cat secure while the other works on removing the adhesive.
- Maintain a Gentle Approach: Speak softly, move slowly, and offer reassuring petting or treats to help reduce stress.
Tip: Never attempt removal if your cat is highly agitated; waiting until they calm down is safer than forcing the process.
2. Necessary Supplies for Safe Removal
Having all materials ready before starting ensures a smooth, efficient process. Essential supplies include:
- Pet-Safe Oils: Coconut oil, olive oil, or vegetable oil are effective for loosening sticky substances without harming your cat’s skin.
- Emulsifier (Mild Dish Soap): A gentle dish soap, such as Dawn, can cut through grease or oil residue after loosening the glue.
- Warm Water and Soft Washcloths: Lukewarm water helps rinse away soap and loosened adhesive. Soft washcloths allow gentle cleaning without irritating fur or skin.
- Absorbent Towels: For drying your cat after washing, and to protect surfaces from mess.
- Petroleum Jelly (Optional): Useful for extremely matted fur or stubborn glue, as it can soften adhesive before combing.
Pro Tip: Keep all supplies within arm’s reach to minimize interruptions, reduce stress, and allow you to work efficiently.
Step-by-Step Safe Glue Removal Process
Removing glue from a cat’s fur requires patience, gentle handling, and the right techniques. The goal is to soften and loosen the adhesive without causing stress, pain, or injury to your cat.
1. The Gentle Application of Oil (The Preferred Method)
Natural oils, such as olive oil, coconut oil, or vegetable oil, work by breaking down the chemical bond of the adhesive, allowing it to loosen from the fur without harsh chemicals. Oils are non-toxic, safe if ingested in small amounts, and also help condition the fur.
How to Apply Without Overwhelming Your Cat:
- Use a small amount of oil—about the size of a dime—to start.
- Gently massage the oil into the glue using your fingers or a cotton ball, being careful not to pull on the fur.
- Focus on saturating the affected area thoroughly while keeping your cat calm. Avoid pouring large quantities, as excessive oil can make the fur slippery and difficult to manage.
Allowing Time to Penetrate:
- Let the oil sit for 5–10 minutes.
- For thicker or more stubborn glue, an additional 5 minutes may be necessary.
- During this time, maintain gentle petting and reassurance to keep your cat relaxed.
Tip: Working in small sections, especially for body glue vs. paw glue, can make the process more manageable.
2. Working the Glue Free (Paws vs. Body Fur)
Techniques for Gentle Removal:
- After oil has penetrated the glue, use your fingers or a blunt-ended comb to gently separate the adhesive from the fur.
- Start at the edges of the glue patch and work slowly toward the center.
- Avoid scissors near the skin unless absolutely necessary, as accidental cuts can occur.
Friction vs. Saturation:
- The goal is saturation first, followed by gentle friction.
- Over-rubbing or aggressive pulling can stress your cat and damage fur.
- For paws or highly sensitive areas, consider using a towel wrap to keep the cat secure while applying gentle pressure.
Additional Tips by Area:
- Paws: Glue on paw pads can be tricky. Work carefully to avoid ingesting oil if your cat licks the area. Small amounts of oil and a soft comb work best.
- Body Fur: Larger patches may require working in sections, massaging oil gradually, and combing slowly to prevent matting.
3. Alternative: Using Commercial Pet-Safe Adhesive Removers
While natural oils are preferred, there are vet-approved adhesive removers available:
Safety Guidelines:
- Only choose products specifically labeled as pet-safe or veterinary-approved.
- Avoid household solvents, acetone, or paint removers, which are highly toxic to cats.
Patch Testing:
- Before applying to a larger area, test a small amount on a tiny patch of fur or skin to ensure there is no irritation or allergic reaction.
- Wait 5–10 minutes and observe your cat for any discomfort before proceeding.
Application:
- Follow the product instructions carefully.
- Use gentle massage techniques and allow the product to penetrate the adhesive before attempting removal with a comb.
Note: Commercial removers can be useful for particularly stubborn glue, but oil remains the safest and least stressful first-line solution.
Post-Removal Cleaning and Aftercare
1. Washing Out the Oil Residue
Even though natural oils are safe for cats in small amounts, leaving them on the fur can cause discomfort, matting, and skin irritation. Here’s how to wash the fur effectively:
- Use a Mild Dish Soap: Liquid dish soap, such as Dawn, is effective at removing oil from fur without harming your cat’s skin. Avoid human shampoo or harsh detergents.
- Lather Thoroughly: Gently work the soap into the affected area to break down all traces of oil. Take care not to rub aggressively, as this can stress your cat.
- Rinse Multiple Times: Use lukewarm water to rinse away soap and oil completely. Ensure no residue remains, particularly in dense fur or sensitive areas such as the paws, underarms, or belly. Residual oil can attract dirt or cause dermatitis if left unwashed.
Tip: For long-haired cats, lifting the fur while rinsing can help ensure water and soap reach the skin.
2. Drying and Grooming Check
Proper drying and grooming are crucial for comfort and to prevent secondary issues:
- Use a Soft, Absorbent Towel: Gently pat the affected area dry. Avoid vigorous rubbing, which can tangle fur or irritate the skin.
- Prevent Excessive Licking: Cats may instinctively lick at any remaining oil or soap, which can lead to gastrointestinal upset. If your cat persistently licks, consider using a temporary cone or wrap until the area is fully clean and dry.
- Check Paws and Sensitive Areas: Pay close attention to paw pads, especially between the toes, and folds of skin where oil or soap can accumulate. Use a fine-toothed comb if necessary to ensure no residue remains.
Tip: After drying, lightly comb the fur to remove any tangles or small residual particles.
3. Monitoring for Skin Irritation
Even with careful removal and cleaning, the affected areas should be monitored for signs of irritation:
- Watch for Redness or Swelling: These may indicate a mild allergic reaction or contact irritation from glue or cleaning products.
- Persistent Licking or Scratching: Continuous attention to the area can be a sign of discomfort or residual residue.
- When to Contact the Vet: If your cat shows significant redness, swelling, hair loss, or develops unusual behavior such as lethargy, vomiting, or persistent distress, contact your veterinarian immediately for advice.
Pro Tip: Keeping a close eye on your cat for 24–48 hours post-removal is often enough to ensure full recovery, but any concerning symptoms should prompt immediate veterinary attention.
Handling a situation where your cat gets mouse trap glue on their fur requires patience, gentle techniques, and the right supplies. By carefully applying oil, working the adhesive free, and thoroughly cleaning and drying your cat, you can prevent discomfort, matting, and potential ingestion. Monitoring for skin irritation and knowing when to contact a veterinarian ensures your cat stays safe and healthy throughout the process.